Table of Content
And don’t worry that it’s covering your colors, it will dry clear. From here, you’ll continue to make loops, but instead of making it on the hoop itself, you’ll make them on the new lines of yarn you just made. As you can see in the image, wrap the yarn in the middle of the closest piece of yarn that’s stretching across the hoop.

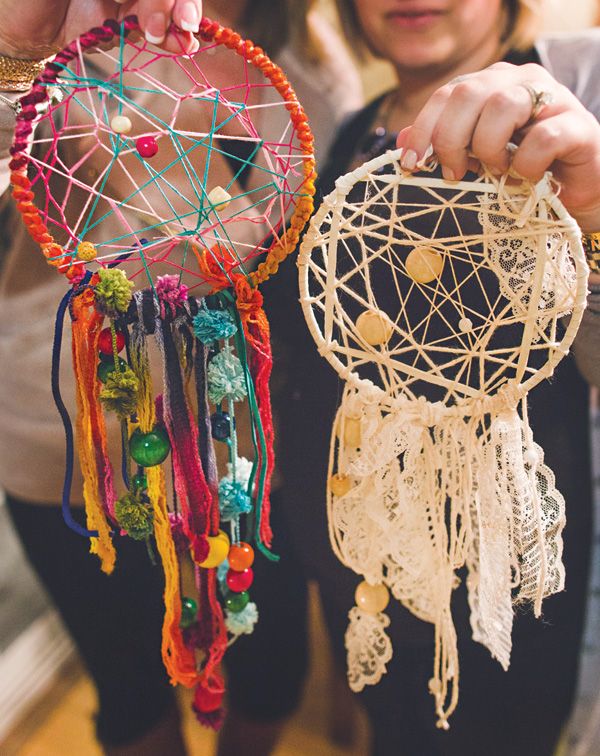
Place a half-inch (1.3 cm) line of glue on the top of the hoop. Holding the end of the suede lace against the hoop, wrap it around the line of glue. When you are wrapping the suede lace, make sure there are no spaces between the pieces of lace. Once you have wrapped the glued section, use a small binder clip to hold the lace in place until the glue dries, about five minutes. How you decorate your dreamcatcher is up to you. You can use feathers, strips of fabric, beads, gemstones, and shells to decorate your dreamcatcher.
DIY Big Dreams Dreamcatcher:
They'll be working up a sweat and practicing important fine motor skills and honing their hand-eye coordination. A dream catcher is a totem of Native American culture. However, over the years its popularity spread far and wide. Now, it is increasingly used as a symbol of positive vibes across the world. Believed to be a protective symbol, dream catchers are gaining in popularity as a gifting option.

This will ensure that the lace stays in place. You should place glue on at least four, evenly spaced spots on the hoop. Eventually the lines will become so small that you won't be able to find a good middle point on which to make loops. At this point you can stop and tie off the yarn in a knot and cut it off.
Dream Catchers: A Dream Catcher Wreath That You’ll ‘Fall’ For
Place a weight/book over the loop so that it dries out flat. As the Native Americans believe, the night air brings with it dreams that are both good and bad. The dream catcher swaying gently in the breeze catches these dreams as they flow by, and pass them to you. Once the circle is small, about the size of a penny or dime, tie a knot around the next string instead of hitching it.
Now, pass the string up through each opening in the web, working your way around the whole hoop. Then, do the same thing again, this time going up through the new, smaller openings in the web. Cut off the excess string, leaving enough to tie a knot, and slide a bead onto the end of the string. Tie a knot so the bead stays in place at the center of the dreamcatcher. Now, tie several long pieces of string to the bottom half of the hoop.
Making the Dream Catcher
This craft is especially interesting because of the story and the legend behind it. Even better, kids get to practice some important skills like concentration, hand-eye coordination, patience, and following directions. ★ Scattered beads represent good dreams caught throughout the night.
Then once you reach the end, you can tie it into a knot around itself and cut it off. You could also get a kit that will have the pre-made hoops, cord, and feathers. Are you going to hang your do-it-yourself dreamcatcher outside? Make sure your adhesive and all other materials can withstand the elements.
For some crafters, the difficulty in crocheting or weaving the center of the design prevents them from trying to make their dream catcher. If symmetry has never been your thing, then this DIY dream catcher with a difference might be for you! We love the unique center of the design, as well as the colorful additions of yarn, beads, and feathers for a quirky take on the traditional. For the hanging loop at the top of the dream catcher, cut a 30cm length of twine. Slip the twine under and around at the very top centre of the hoop.

Here’s something you don’t see every day – a DIY horseshoe dream catcher! These are perfect for those who like to embrace both their bohemian and rural sides. We love the idea that these designs will bring some added luck into your home too. Did you know that you can also create a very easy-to-make Minnie Mouse-inspired dream catcher? Not only is this one eye-catching and kitsch, but it also serves a pretty cool purpose – holding all of your bows!
Nicole holds a Certificate in Interior Design from the New York Institute of Art and Design. She opened Stencil in 2017 to teach others to create DIY projects that fit their home and lifestyle. This article has been viewed 2,932,709 times. Continue looping the string around the hoop.
The crafty people over at Kiwicrate.com have their own way of making a dream catcher for kids. The process is similar to the others, but what we love about their approach is the unabashed use of beads. Paint glow in the dark fabric paint all over the dream catcher. Don't worry if it covers your colors, it will dry clear. Then once you’re done with that row, you’ll notice you’ve made a new set of lines with the yarn so continue wrapping in the middle of these lines.


No comments:
Post a Comment